I don't intend to show folks how I do my painty stuff, with a selection of step by step photos, everyone has their own approach to painting, mine is slow, and laboured, and there are a hundred and one better guides hiding out there in internet land, for folks to refer to.
What I will do here, is to give you a selection of images, all freshly "borrowed" from various sources, and an idea of the paint colours I have found the most useful to get my stuff to look the part.
Grab yourselves a cuppa, its gonna be a long old post this one.
So lets crack on, and have a dekko at your standard Regulares type soldier
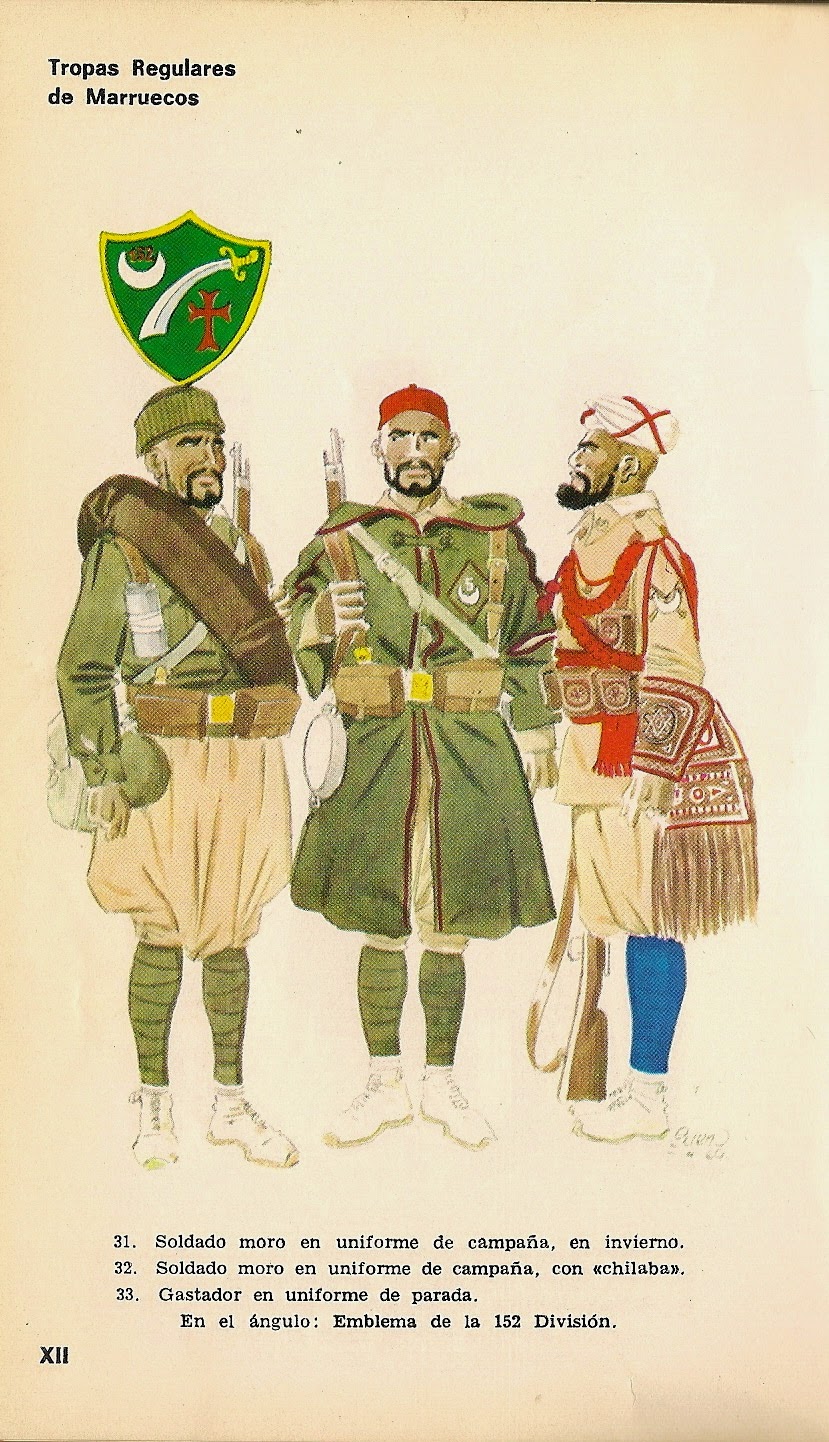
Freshly pinched from the pages of the Bueno uniform book, these two plates are a fairly good representation,
and they make a useful starting point for a general overview of the Regulares basic uniform.
Righty ho, lets go, and first off, after giving my figure a good old clean up, I blast em with a burst of white undercoat, yes thats right, white. Now I fully understand that black is the colour of choice for undercoating figures, but I simply cannot work with black, my eyesight is just too poor to cope.
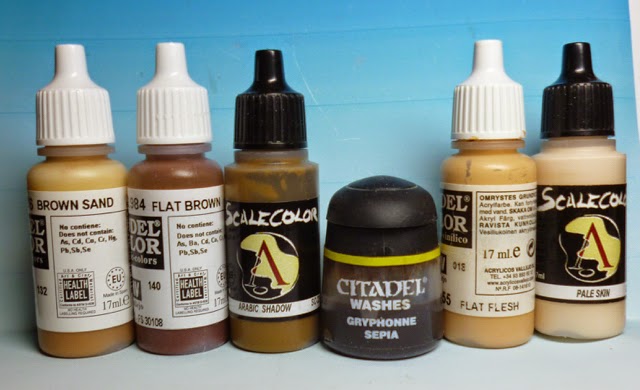
My starting point, I always do the flesh bits first, and here are the two palettes I use.
Moroccan flesh is a bit darker, you could in fact go for the full black African on some of the figures, but most of them will be more milky coffee coloured.
I basecoat with either the medium flesh, or the dark flesh, just to give a little variety, and once the base has dried, I chuck on the Gryphonne Sepia wash, this helps to pick out the shadow areas on the face. I then go in, with a shadow wash using Flat Brown and Arabic Shadow this deepens the shadow areas, I let it all dry out, then using a darker colour ( usually a dark black brown), I fill in the eye sockets.
First highlight is the original base colour, I then build up the highlights using mixes of the base colour and Flat Flesh, the very final highlights are in Pale Flesh, but go very sparse on these. To finish off, I do the eyes, and any facial hair.
For a bit of variety, I have a second flesh palette I use
I replace the Dark and Medium Flesh with Brown Sand as a base, and then work the colours the same as before.
Next step, I tend towards the trousers, now the Regulares are described as wearing "Lentil-Coloured" trousers, and I see this as a sort of sandy yellow colour, so here's my trouser palette
Tan Yellow provides the base colour, followed by a Gryphonne Sepia wash, once again I use Flat Brown to deepen the shadows, and mix up a Tan Yellow/Flat Brown wash, to help fill out the lighter shadows, if the areas are deep shade, then a wash of Dark Rust helps to deepen them a bit more.
First highlight is the Tan Yellow base again, and I use mixes of Tan Yellow, and Pale Sand to bring the highlights up, with a final tiny highlight of just Pale Sand to finish.
Next up, the shirt, and here is the palette that I use. For a bit of variation, I use Buff, DarkSand and Pale Sand for a base, then its a wash of either Devlan Mud, or Gryphonne Sepia, sometimes I add a deeper shadow using various shades of brown, then begin to highlight up using the base to start, and then work up by mixing in either Silver Grey, or Ivory
The following image shows both the trousers and shirt quite well
Sometimes the figures will be wearing the short tunic, or the Chilaba (Djellaba) hooded coat, the tunic appears to be the standard greenish khaki favoured by the Spanish Army, the issue Chilaba is in the same shade, and for these two, here is the palette I use
The base colour is mixed up using Brown Violet, and either Green Brown, or Khaki Grey, varying thses mixes wll give you a bit of variation. This is followed up by a wash of Devlan Mud, and sometimes I use the Dark Brown Model Wash. Deeper shadow is added by mixing Brown Violet, and Black/Brown. I then work the highlights, starting with the base mix, then adding Khaki to lighten, with a bit of Pale Sand.
To break up the look of your units, you can paint the Chilaba in various shades of brown, as many troops brought their own Chilabas with them, just do a google search for some ideas.
You can see in this period photo, the variation of colour in the Chilaba.
Headgear next, and we will start with the Tarbush (red fez) and here is my red palette
base coat is Plain Red, I wash over this with thinned down Burnt Cadmium Red, to give a variation, I use Carmine Red as a base as well.
Highlights are worked up using the base, and Vermillon, final highlight is a little touch of Orange Red around the edges.
The Rexa (Turban) is painted up with this selection.
Base coat, either Silver Grey, or Ivory, followed by a Devlan Mud wash. I use the two greys to add a bit of depth to the shadows, then highlight up with the base, and a mix in of Offwhite, with a final pure Offwhite highlight to finish.
Puttees, can be either khaki, or blue
Heres my blue palette
Prussian Blue base, with a wash of Dark Prussian Blue, I use the Dark Sea Blue to add depth into the shadows, then highlight back up with the base, and lighten it using Pale Sand.
The Khaki version, well thats just Khaki, shaded and highlighted.
The boots get a coat of Pale Sand, and a Devlan Mud wash.
Then its onto the Ammo Pouches and webbing, grab yourself a handful of leathery brown shades, here are my favourites
I base coat using Light Rust, Leather Belt, and Light Brown, darken the shadows with Dark Rust, and highlight up using the base, and mix and match paler shades to give that battered leather look.
Finally, the haversack
Base coat of either Khaki, or Hammerfall Khaki, and a wash of Gryphonne Sepia, or Devlan Mud, I use thn washes of the Black Brown to add a bit of depth, and then lighten up with base coat highlights, and Pale Sand.
You can also paint the haversack, as a leather version, as these were also used.
Weaponry, well I expect everybody has their own favourites to do the guns with.
So, a few pics to help you along the way
Next time I will add a few more fine detail points, like rank markings, officer uniforms, etc, until then I hope this post will help folks on their way, to painting a Regulares force.
Cheers


Good article. Thanks 8)
ReplyDeleteA wonderful article there Nigel and a very helpful one too. I seeing how other painters come up with and use colours on there figures
ReplyDeleteThat's a lot of work, but it produces brilliant results.
ReplyDeleteLike you, I find white undercoat preferable to black. Not only is it kinder to the eyes, but the figure ends up looking more colourful. Black undercoated figures in the larger scales look rather dead to my taste.
And, finally, dare I say, fezzes are cool.
Nice work.
ReplyDeleteI use a grey undercoat (Halfords primer) these days. My eyes are so shot that if I use black I cannot see anything to paint.
Nice article, Devlan Mud, those were the days, probably more valuable than Saffron.
ReplyDelete